Download GetDataBack for Mac Alternative to Get Back Data Easily on Mac
Jul 31,2013 10:11 am | Published to Data Recovery by Derek Morrison (Google+)
Follow @DerekMorrisonRD
GetDataBack is a Windows recovery software created by Runtime Software. With it, you're able to recover lost data from internal and external hard drives. GetDataBack has different variants that are specially designed for the FAT and the NTFS file systems.
However, GetDataBack only works on Windows computers. If you're now using a Mac, you need to find a GetDataBack for Mac alternative. Here I suggest you to use WS Data Recovery for Mac. It's a powerful data recovery software that supports all regular file formats like HFS+ (Mac), HFSX (Mac), FAT16, FAT32, exFAT, NTFS (No variants, in one software). Not only can it recover deleted files from Mac hard drives, but also from external hard drives, digital camera cards, iPod/iPhone/iPad, MP3/MP4 player, etc. It's the best GetDataBack for Mac alternative. It supports the latest Mac OS X 10.8 Mountain Lion and earlier versions to 10.5 Leopard.

Also want to retrieve deleted data on PC? Get it here.
Download GetDataBack for Mac Alternative to Recover Deleted Data Quickly
After downloading and installing GetDataBack for Mac alternative, launch it from the installation folder (usually the Applications folder) and follow the steps below to get back your deleted files easily.
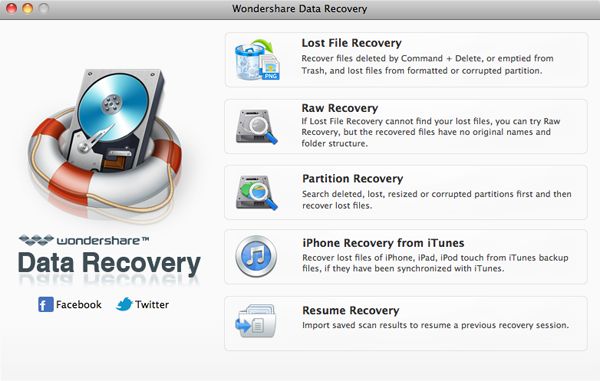
Step 1:Choose a recovery mode to recover files on Mac
First try the Lost File Recovery mode. It can recover files deleted by Command+Delete, emptied from Trash, or formatted by mistake. If this mode doesn't work for you, you can try Raw Recovery or Partition Recovery. The former will scan deleted files more completely, while the latter helps you recover files from deleted, lost, resized or corrupted partitions.
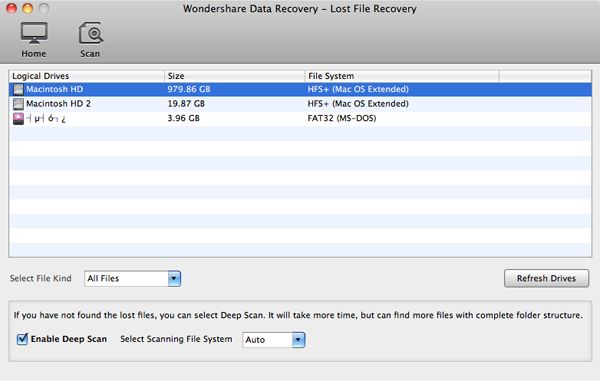
Choose the drive on which you've deleted files
Simply choose the drive from the list. Besides Mac hard drives, you can also choose from drives your storage devices are mounted to Mac. Also specify the file type to Images, Video, Audio, Documents, etc., if you want to recover specific files.
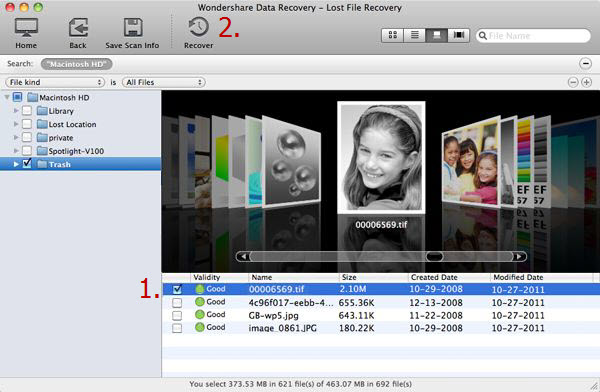
Preview files and recover to another drive or disk
After files are found, use the folder tree, preview and search bar to browse and locate your files quickly. To recover files, just check the checkboxes before the files and hit the Recover button on top. You can then choose a folder (not the drive/partition containing your lost files) to store the recovered files.
Video Tutorial: How to Use GetDataBack for Mac Alternative
Download the best GetDataBack for Mac substitute now and follow the video tutorial below to get back your deleted files.

 Follow us on Twitter